
AE Graphics to Audio Amplitude #1
Demonstration

Avoiding Keying Every Frame:
Saving time producing animated graphics
Sometimes generating keyframe information from audio amplitude is easier and more affective than keying every frame manually. If there are a lot of repeated sounds or a graphic needs to “react” to a sound I use a code snippet called “linear react”.
Linear React code is available at the bottom of this page.
A: After Effects Layers
using expressions and “Pickwhip”

Attaching Graphics to Amplitude Using Code
After Effects layers are the same as Photoshop or Illustrator layers, in this case there is a timeline attached to each layer. In the timeline objects can be directed to move or transform at specific times in the timeline. For graphics that move exactly to audio in the timeline, code can be added to attach a graphic to the audio amplitude making it react to high and low amplitudes.
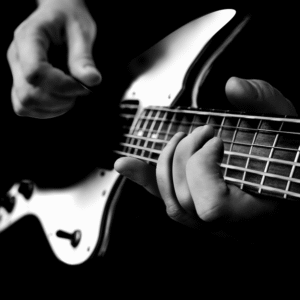
Above: Amplitude on the layer marked (1) is attached to the graphic layers (2). Numbers in (red) are controlled using code in the “expressions” panel. The Guitar layer
(x) and (y) rotations in this composition are connected to audio amplitude.
B: Code Expressions
writing code in After Effects

Linear React- AE Code
The code for “Linear React” is a snippet I found online. It uses set parameters to connect one set of properties to another, in this case amplitude is connected to the (x) and (y) rotations of the guitar. Amplitude from an audio file in After Effects can be generated using AE “Keyframe Assistant / Convert Audio to Keyframes“.
Above: (1) “Linear React” can be added to the resulting channels (right, left or both). The first pair of numbers in the linear react code set what will be considered high and low according to the audio. If the lowest amplitude in the audio is 0 and highest is 10, the first pair of numbers in the code will be 0 and 10. Detecting high and low amplitude can be done by opening the “Graph Editor Mode” in the AE timeline layers panel. Layers can be attached to the audio amplitude layer using “pickwhip“.
Above: (1) The second pair of numbers in linear react relates to the maximum and minimum range of the graphics object. If the object should move between 100 and 200 units left or right, the resulting numbers for the second pair in your linear react code should be 100 and 200.
Graphics and Amplitude Coding
Code and Result
The Layers (A) in the timeline (B) determine the outcome (C) including code in the timeline layers. In this case linear react is being used to control the y-position of the hand stroking the guitar cords.
Different audio amplitudes can be attached to different graphics in a composition to achieve different effects. In this project I separated different guitar tracks from my song using Garage Band. Guitar track 1 controls the right hand, guitar track 2 controls the left hand. Two separate tracks were converted to amplitude using “Convert Audio to Keyframes“. Graphics layers that need to react to the amplitude layers were attached using “pickwhip” after adding “linear react” to the amplitude layer.


Detecting Maximum and Minimum Amplitude from Your Audio
AE “Graph Editor Mode”
Maximum amplitude is the highest value and Minimum amplitude will be the lowest. In graph editor mode we can see the peaks and valleys. The highest peak(D) will indicate our MAX value. The lowest value(E) is the lowest part of the graph line, usually this is 0. Values are found on the left side of the graph editor.
In my composition amplitude from different instruments in my song are used to control different graphics. An amplitude for the right hand stroking the cords was used that was different to the amplitude track used for the hand controlling the frets. The result is not completely accurate but it does produce a specific and consistent graphic style according to the audio. I added amplitude for other visual effects by connecting blur and 3D rotations to moving graphics in the video.

Control Y Position
To control the y-position of a graphics layer in After Effects,
- make an amplitude layer from your audio using “Convert Audio to Keyframes“
- add code to the “Both” channel (option+click) the stopwatch connected to the “Both” channel and add “Linear React” code in the timeline.
- add linear react code to the “Both“ channel
- pickwhip the y-position property of the graphic to the “Both” channel in the audio amplitude layer.

Code Numbers
Amplitude can be attached to the sliding hand on the guitar neck. I used the maximum value of the amplitude to denote a position at the top of the neck (0 pixels). Then I used the Minimum value of the amplitude to denote a position at the bottom of the neck(-400 pixels). Since the amplitude jumps between 0(minimum) and 25(maximum) amplitude, the sliding hand jumps between 0(minimum) and -400(maximum) pixels. This has the effect the hand moves to high amplitude in the music by moving the slide hand up to 400 pixels to the left(-400).

Other Uses
I recently updated the video to include amplitudes for blur effects and an overall rotation of the composition centered to the guitar. To do this I pickwhip values like “direction blur amount” to amplitude so when the amplitude is high and the arm is moving the “directional blur” is high and low when the amplitude is low and the arm is not moving. After effects has a 3d component which I connected to amplitude to make the scene have added dimension controlling the x, y, z values.
Download: Linear React Code
for use in After Effects
Click the download button below to download a .txt file containing the “Linear React Code” for After Effects.
Other Examples
Using Linear React in other capacities
Below are some more examples where I use Audio Amplitude and Linear React. It’s important to note I created the music for these videos and have access to each separate instrument. In the case you do not have each instrument separately, any audio file will work but will have a different result. GarageBand is a good place to start to produce sound effects and compositions for audio amplitude in After Effects.